Embarkation day is the best day of your cruise. After months (and sometimes even years) of counting down, the big day finally arrives and you’re ready to get your hard-earned vacation started. And while you could just show up at the terminal and wing it, we’re big advocates of having a game plan in place. A little bit of planning can help you deal with everything from arriving at the port to checking in and navigating security, all of which will get you onto the ship as quickly as possible.
First Thing’s First

There’s no such thing as planning too far ahead when it comes to making sure things run smoothly on embarkation day. The moment you’ve booked and made that first deposit, you can usually begin the online check-in process. This first step is crucial, as it’s where you could avoid the first major roadblock. As part of the online check-in process, you’ll be asked to provide information regarding everyone in your party, including passport information or other important identity-confirming documentation.
Trust us: The last thing you want is to arrive at the dock and not have proper documentation. We’ve heard too many horror stories about people who, just as their cruise is about to begin, find themselves having to deal with a lack of proper identification… which sometimes results in being unable to actually board the ship and go on the cruise.
READ MORE: Elderly Couple Left Behind Receives Dream Cruise
A few days before your cruise is set to depart, print out all of your cruise documents and make sure that everything is in order. Do NOT put your documentation or identification in the luggage you’re going to check. Why? Because generally speaking, you will wind up handing your luggage over to baggage handlers outside the cruise terminal. Keep the documentation either in your carry-on luggage or, better yet, in a folder or envelope that someone in your party carries with them. (Honestly? Make it the most responsible person in your group. If Uncle Mike has a tendency to misplace everything from his glasses to his car keys, you definitely do not want him in charge of your travel documents.)
Research the terminal you’re cruising out of.
We’re not suggesting you memorize the schematics of the terminal or anything, but the more you know about the facility, the better. Where’s the best place to be dropped off if someone is going to be taking you to the pier? (Just as importantly, where should they pick you up when you come home after your cruise? The drop-off and pick-up spots are often different.) If you’re going to be driving to the terminal, where’s the best place to park? (While parking at the terminal is definitely the most convenient option, it’s rarely the cheapest. You can usually find a nearby garage with way better rates!) If you’re sailing out of a terminal that handles multiple ships on any given day, make sure you know which of the numbered or lettered sections of the terminal your ship is going to be docked at. Even if you’re sailing a ship you’ve been on before out of the same terminal, don’t assume it will be using the same docking slip. Things can change depending on how many ships are in port that day, scheduling, and their individual provisioning/refueling needs.
Checking Your Baggage
Hopefully, you printed out your luggage tags at the same time as your cruise documents. Make sure to fill out and attach the tags before you arrive at the pier. Don’t be that person who holds everyone up because they need to borrow a pen and figure out how to attach the tags at the pier when everyone else is ready to hand their luggage over. If you’re flying or taking a bus before heading to the pier, don’t attach the cruise line luggage tags until you’re heading to the pier. Otherwise, the tags might get ripped or, worse, they might wind up confusing baggage handlers at the airport. The last thing you want is to find out that you’ve arrived at JFK, but your luggage is on its way to Hawaii. When it’s time to attach the luggage tags, make sure you secure them with some tape or pick up some plastic bag sleeves from Amazon.

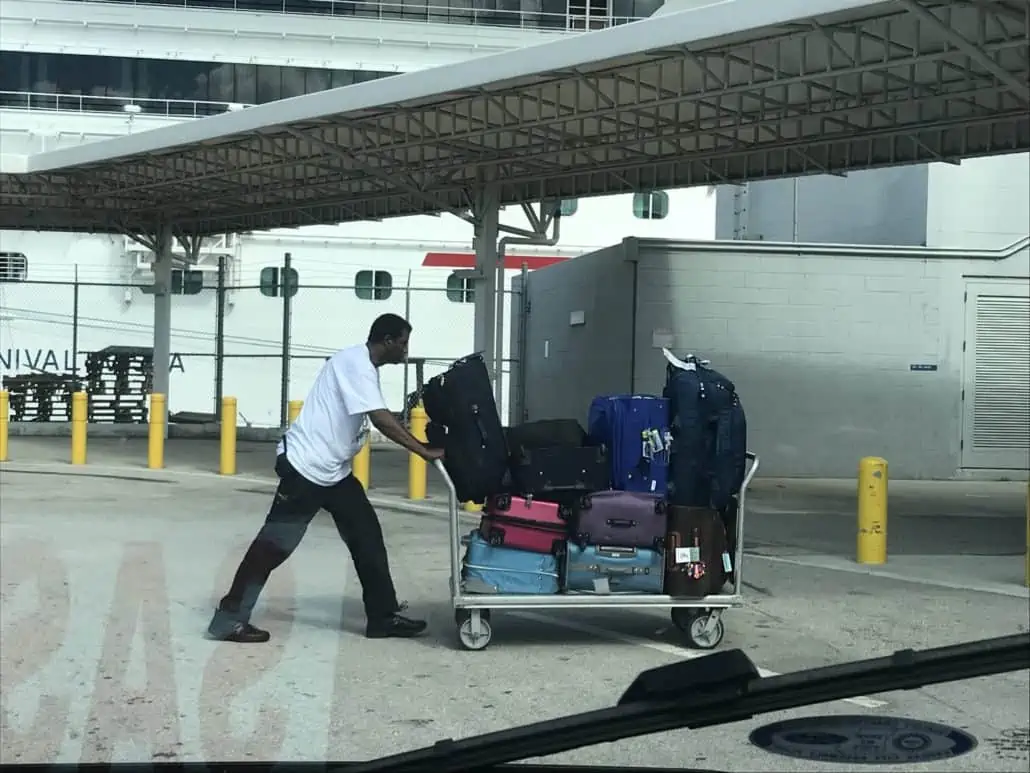
Once you arrive at the cruise terminal, you’ll be greeted by the luggage porters. If you forgot the printable tags for your bags, they will have the ability to look up your information on the passenger manifest and provide luggage tabs. (If this happens and you have priority embarkation with the cruise line, make sure you let them know so they can affix the proper tag to your bag!)
It’s always a good idea to extend a couple dollar tip to the baggage porter. After all, these are the people who are going to make sure your luggage actually gets onto the ship. So, I repeat, it’s always a good idea to extend a couple dollar tip to the baggage porter.
READ MORE: The Ultimate Guide To Cruise Tipping
Going Through Security
An empty cruise terminal.Now that we’ve gotten you to the pier and made sure your luggage is going to be onboard, it’s time to make sure your bags aren’t traveling solo. Remember how earlier, we emphasized the importance of having your cruise documentation? Well, here’s where it really starts coming into play. At most ports, you’ll approach a cruise line agent and show them your boarding pass and passport (or other identity-confirming identification, such as a driver’s license and birth certificate). Once they’ve verified that everything is in order, you’ll be directed to the security checkpoints.
If you aren’t directed to a particular security line, look for the shortest. Most people tend to follow the person in front of them (and studies show that the majority of people tend to go to the middle or the right, almost always ignoring the ones to the left), but that might not be the smartest or quickest decision.

The security checkpoint at the cruise terminal is not like the TSA checkpoint at the airport. You do not need to remove your shoes, liquid items, or electronics. You do, however, need to empty your pockets of anything that might set the metal detector off including keys, change, cell phones, etc. Also make sure that you aren’t carrying any items which are not allowed, a completely list of which can be found on the website of your cruise line.
This is probably a good time to talk about smuggling liquor on board. Look, many people try and do it. Whole mini-industries have cropped up supporting efforts to subvert the rules. But there’s a pretty good chance that if you attempt to bring booze on board, you’re going to be caught. They will confiscate the liquor and, especially if it’s in a carry-on bag, you’re probably not going to get it back. Some lines do allow passengers to bring on a limited amount of wine, often charging a per-bottle “uncorking” fee if you want to enjoy it in the dining room. Again, what is (and is not) allowed can be found on the website for the cruise line on which you’re sailing.
The Check-In Counter
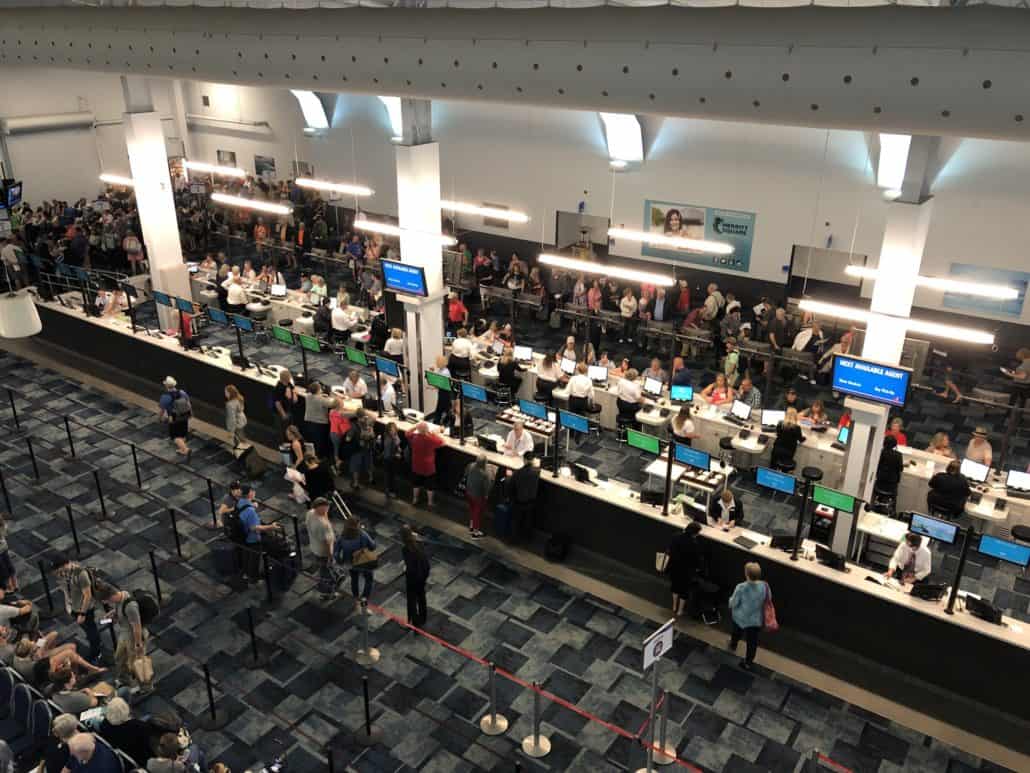
Once you’ve gone through the security line, you’ll be directed to the appropriate check-in counter. Usually, this is not a one-size-fits-all situation, in that passengers who book through the casino or who have achieved a higher status level with the cruise line will have separate check-in lines. Everyone else will generally be filed into one or two lines. (It’s worth noting that thanks to constantly-evolving technology, the check-in process is becoming ever smoother. It’s easy to foresee a future in which facial-recognition software, already being used in limited capacities by some lines, will make checking in as easy as walking through a scanner.)

If you’re in the general boarding line, you’re likely to spend a little time there… especially if you arrive during a peak time! If you want to avoid the rush, get to the pier early. (Of course, this will often mean you just wind up sitting in the terminal after checking in, as the ship may not be ready for boarding.)
When it’s your turn to approach the check-in counter, have your cruise documentation and passport ready. You’ll be asked to fill out a passenger health form, and the person behind the counter will take a photograph which will be used to identify you each time you get on and off the ship during the trip. The person behind the counter will also help you set up an onboard spending account, which most people do via credit card. The account will be linked to your keycard, allowing you to charge items to your onboard spending account. At the end of this process, you’ll be presented with your keycard. If the ship has not yet begun boarding, you’ll likely be given a boarding number and sent to a general holding area where you’ll wait for them to call your number. (It’s sort of like taking a number at the deli counter and waiting for them to call it, but in this case instead of a pound of ham, you’re being given permission to board the ship and start your vacation.)
Boarding the Cruise Ship

When at last it’s your turn to board the ship, there will usually be one final step. As you head toward the ship, carry-on luggage in hand, they will ask to see your keycard so that they may scan it. Why? This is how they know when everyone is onboard. You’ll notice that during the course of your vacation, each time you get on or off the ship, they do the same thing.
At this point the only thing left to do is head up the gangway, take a deep breath and relax. Your vacation is finally starting.